Spring Boot 客製化 登入 ( Login ) 與 認證 (Authenticate) 機制
一個網站基本的除了有前台的頁面展示外,還必需要有後台的管理機制,在官方網站有一篇文章:Securing a Web Application 在說明如何撰寫登入認證機制。之前在 使用 Eclipse 快速建立 Spring Starter Project 我們已經快速建立了一個網站,接下來將要對它加入登入的認證機制,並且將利用 AdminLTE3 來美化頁面, 預計需要有下面三個頁面,而這些頁面將使用 Freemarker 的模版引擎來改寫。
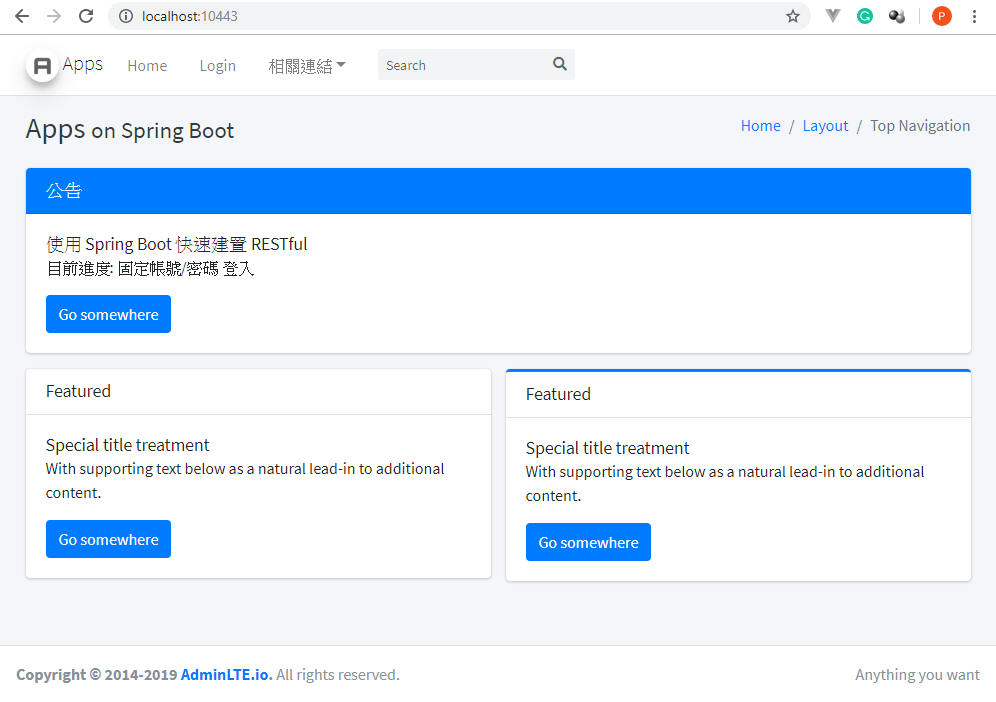
- 第一個頁面登入前的首頁 home.html:使用 pages/layout/top-nav.html 這個頁面
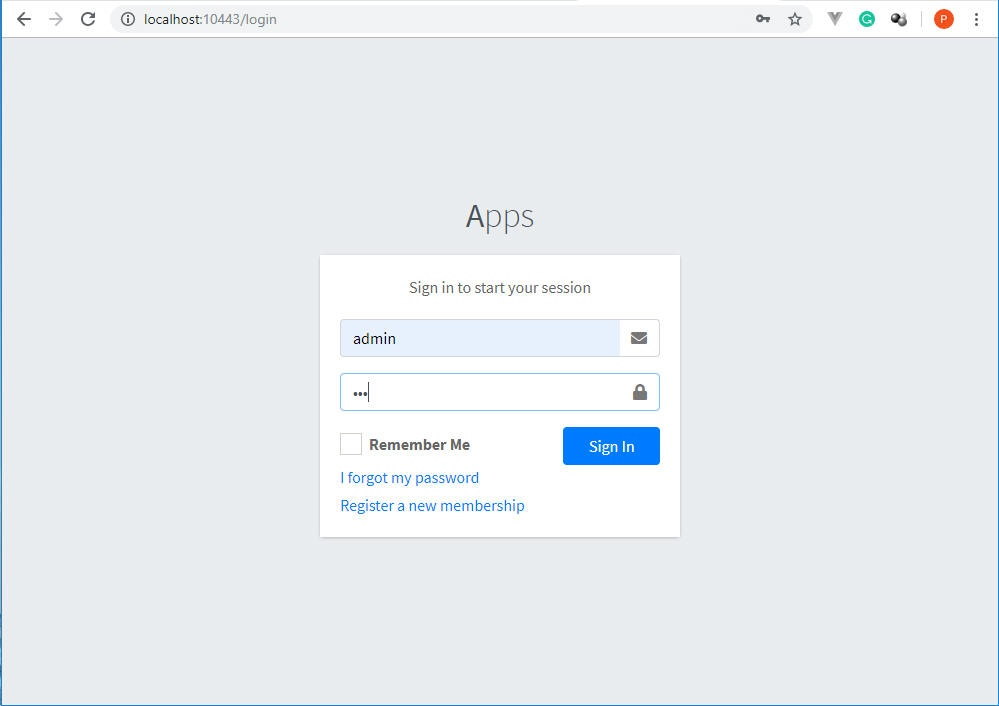
- 第二個是登入頁面 login.html:利用它作好的 pages/examples/login.html 頁面來作為登入的頁面。
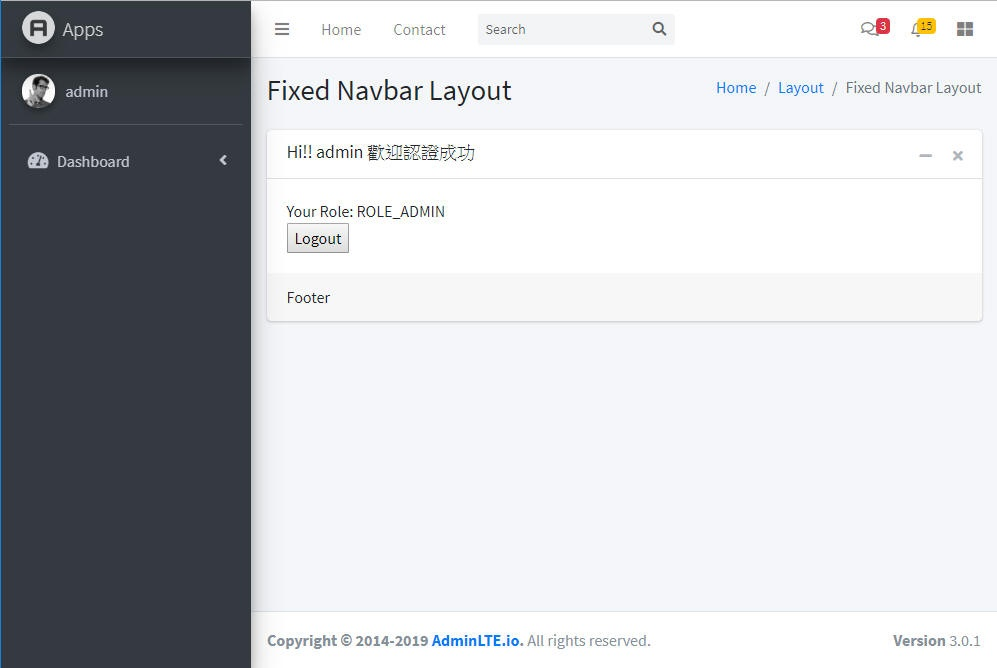
- 第三個則是認證後的首頁 auth-home.html:使用 pages/layout/fixed-topnav.html 這個頁面。
系統操作劃面
先來看完成後的劃面長怎樣,登入系統首頁時
按下 Login 時,轉到登入頁面
依照登入的帳號不同,顯示登入者帳號,以 admin 登入時
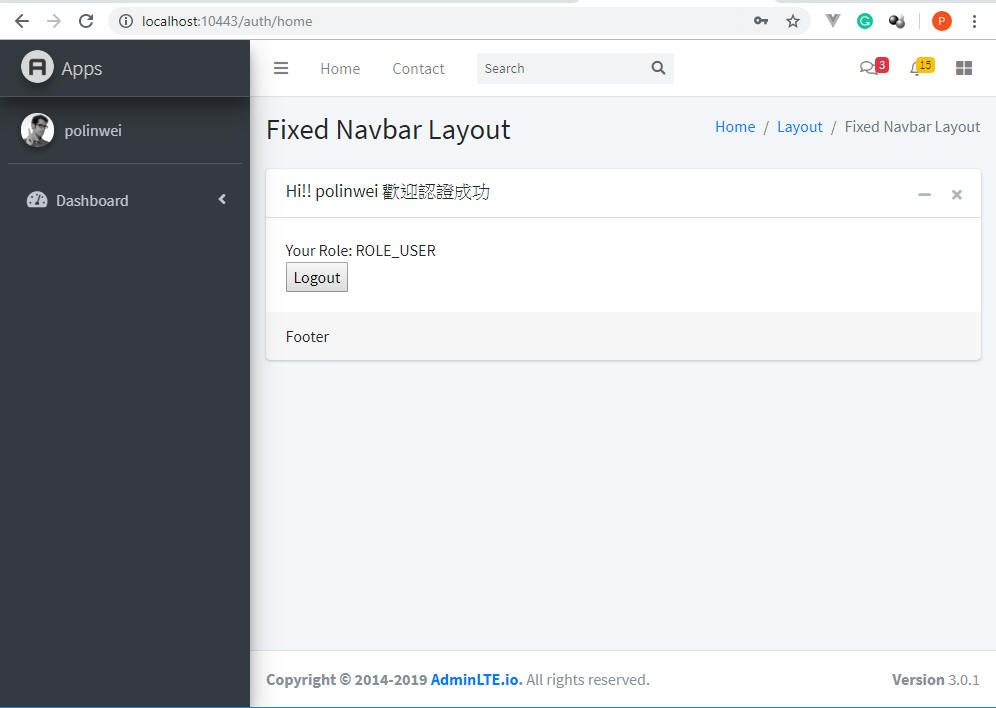
以一般使用者帳號登入時
設定 View : 首頁及登入頁面
大致上的登入劃面瞭解後,就開始來實作程式,首先設定首頁及登入頁面:
@Configuration
public class MvcConfig implements WebMvcConfigurer {

 private final Logger logger = LoggerFactory.getLogger(this.getClass());

   public void addViewControllers(ViewControllerRegistry registry) {
     registry.addViewController("/home").setViewName("home");
     registry.addViewController("/").setViewName("home");
     registry.addViewController("/login").setViewName("login");
   }

}
實作 AppUserDetailsService 來替換預先的認證方法:
用 class AppUserDetailsService implements UserDetailsService 來替換預先的認證方法,Spring Boot 在認證 spring-boot-starter-security 裡的有預留客製化的接口,可以讓您客製自已想要的認證方法,在這裡先建立一個 Class: AppUserDetailsService ,並在此預設好兩組固定的帳號與密碼,以便後面驗證測試。
@Service
public class AppUserDetailsService implements UserDetailsService {
 private final Logger logger = LoggerFactory.getLogger(this.getClass());

 private static List<UserObject> users = new ArrayList();

 public AppUserDetailsService() {
  users.add(new UserObject("admin", "123", "ADMIN"));
        users.add(new UserObject("polinwei", "234", "USER"));
 }

 @Override
 public UserDetails loadUserByUsername(String username) throws UsernameNotFoundException {
  Optional<UserObject> user = users.stream()
                .filter(u -> u.name.equals(username))
                .findAny();
  if (!user.isPresent()) {
  throw new UsernameNotFoundException("User not found by name: " + username);
  }
  return toUserDetails(user.get());
 }

    private static class UserObject {
        private String name;
        private String password;
        private String role;
        BCryptPasswordEncoder passwordEncoder = new BCryptPasswordEncoder();

        public UserObject(String name, String password, String role) {
            this.name = name;
            this.password = passwordEncoder.encode(password);
            this.role = role;
        }
    }

    private UserDetails toUserDetails(UserObject userObject) {

        return User.withUsername(userObject.name)
                   .password(userObject.password)
                   .roles(userObject.role).build();
    }

}
上面的程式中, UserObject 的密碼需要經過 BCryptPasswordEncoder 方法來作加密,否則在認證的過程中會出現 Encoded password does not look like BCrypt 的錯誤。
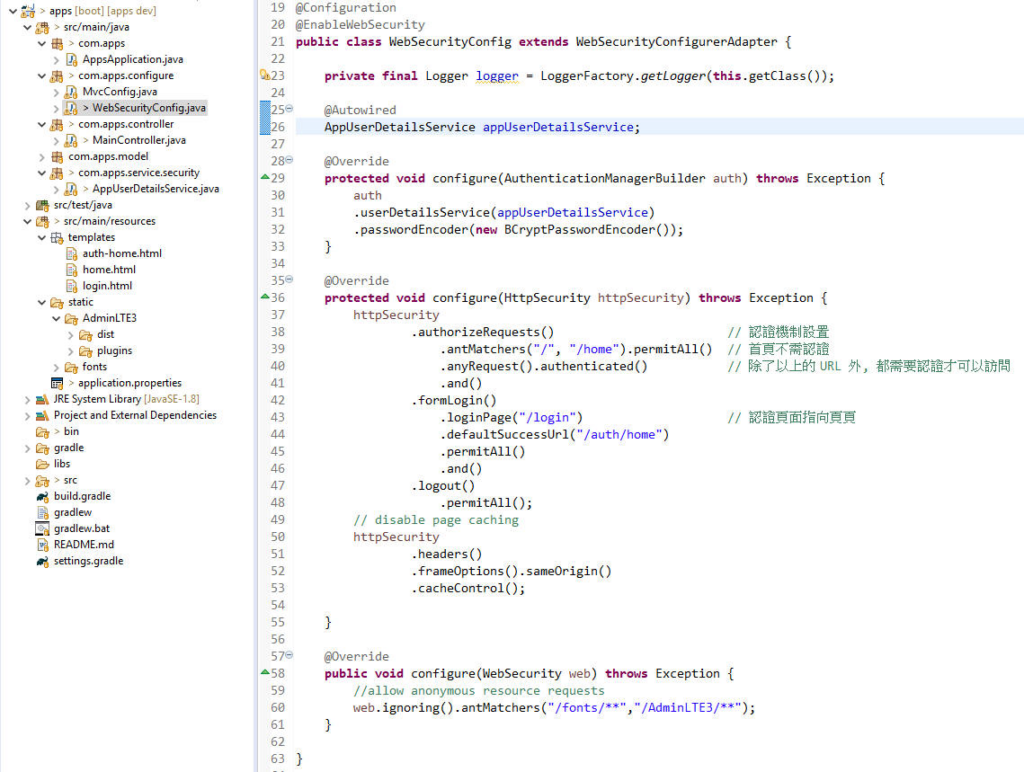
WebSecurityConfig 客製化登入系統流程的設置
這裡主要是設定那些頁面是不需要認證就可以查詢,資源目錄如:fonts 及 AdminLTE3 目錄下所有的檔案及目錄。以及登入與認證成功後頁面的 URL
@Configuration
@EnableWebSecurity
public class WebSecurityConfig extends WebSecurityConfigurerAdapter {

 private final Logger logger = LoggerFactory.getLogger(this.getClass());

 @Autowired
 AppUserDetailsService appUserDetailsService;

 @Override
 protected void configure(AuthenticationManagerBuilder auth) throws Exception {
  auth
  .userDetailsService(appUserDetailsService)
  .passwordEncoder(new BCryptPasswordEncoder());
 }

    @Override
    protected void configure(HttpSecurity httpSecurity) throws Exception {
  httpSecurity
    .authorizeRequests() // 認證機制設置
     .antMatchers("/", "/home").permitAll() // 首頁不需認證
     .anyRequest().authenticated() // 除了以上的 URL 外, 都需要認證才可以訪問
     .and()
    .formLogin()
     .loginPage("/login") // 認證頁面指向頁頁
     .defaultSuccessUrl("/auth/home")
     .permitAll()
     .and()
    .logout()
     .permitAll();

  // disable page caching
        httpSecurity
                .headers()
                .frameOptions().sameOrigin()
                .cacheControl();

 }

 @Override
 public void configure(WebSecurity web) throws Exception {
  //allow anonymous resource requests
  web.ignoring().antMatchers("/fonts/**","/AdminLTE3/**");
 }

}
控制器 Controller: MainController
@Controller
public class MainController {
 private final Logger logger = LoggerFactory.getLogger(this.getClass());
 private Authentication auth;

 @Autowired
 UserDetailsService userDetailsService;

 @RequestMapping("/login")
 public String loginForm(HttpServletRequest request, Model model) {
  auth = SecurityContextHolder.getContext().getAuthentication();
  if (!auth.getPrincipal().equals("anonymousUser")) {
   return "auth-home";
  }
  return "login";
 }

 @RequestMapping("/auth/home")
 public String authHome(Model model) {
  auth = SecurityContextHolder.getContext().getAuthentication();
  model.addAttribute("username", auth.getName())
   .addAttribute("roles", auth.getAuthorities());
  return "auth-home";
 }

}
在 使用 Eclipse 快速建立 Spring Starter Project 一文有提到,建立專案時,專案預設的 package 是在 com.apps ,所以 MainController 的 package 需要在 com.apps 下,如本例為 com.apps.controller。
複制 AdminLTE3 必要的檔案
複制 AdminLTE3 必要的檔案到 src/main/resources 的 static 目錄下,將 Spring Boot 在 Eclipse 的安裝與設定 中說的,下載 Web Page Layout – AdminLTE3: https://github.com/ColorlibHQ/AdminLTE/releases 並只要複制 dist & plugins 這兩個目錄即可。最後再修改一下登入頁面 login.html 及 認證後的首頁 auth-home.html 。
登入頁面 ( login.html )中的 Form
撰寫 login.html 中的登入表單(Form)程式碼如下:
<form action="/login" method="post">
<div class="input-group mb-3">
  <input type="text" class="form-control" name="username" placeholder="Username">
  <div class="input-group-append">
 <div class="input-group-text">
   <span class="fas fa-envelope"></span>
 </div>
  </div>
</div>
<div class="input-group mb-3">
  <input type="password" class="form-control" name="password" placeholder="Password">
  <div class="input-group-append">
 <div class="input-group-text">
   <span class="fas fa-lock"></span>
 </div>
  </div>
</div>
<div class="row">
  <input type="hidden" name="${_csrf.parameterName}" value="${_csrf.token}"/>
  <div class="col-8">
 <div class="icheck-primary">
   <input type="checkbox" id="remember">
   <label for="remember">
  Remember Me
   </label>
 </div>
  </div>
  <!-- /.col -->
  <div class="col-4">
 <button type="submit" class="btn btn-primary btn-block">Sign In</button>
  </div>
  <!-- /.col -->
</div>
</form>
認證後的首頁 auth-home.html,加入登出的按鈕
認證後的首頁 auth-home.html 的程式碼:
<!-- Default box -->
<div class="card">
  <div class="card-header">
 <h3 class="card-title">Hi!! <#if username??>${username}</#if> 歡迎認證成功</h3>

 <div class="card-tools">
   <button type="button" class="btn btn-tool" data-card-widget="collapse" data-toggle="tooltip" title="Collapse">
  <i class="fas fa-minus"></i></button>
   <button type="button" class="btn btn-tool" data-card-widget="remove" data-toggle="tooltip" title="Remove">
  <i class="fas fa-times"></i></button>
 </div>
  </div>
  <div class="card-body">
 Your Role:
 <#list roles as role>
   ${role}
 </#list>
 <form action="/logout" method="post">
   <input type="hidden"
    name="${_csrf.parameterName}"
    value="${_csrf.token}"/>
  <input type="submit" value="Logout">
 </form>

  </div>
  <!-- /.card-body -->
  <div class="card-footer">
 Footer
  </div>
  <!-- /.card-footer-->
</div>
<!-- /.card -->
這樣就可以執行了。在執行前,再來看一下整個專案的目錄結構吧!!

Tags
Video

發佈留言