Laravel Breeze with Vue 3 use Inertia In SSR
系統環境:
- Lavavel 11
- PHP 8.2
Step 1: 安裝 Lavavel 與連結資料庫 (Install Laravel & Connect Database)
composer create-project laravel/laravel:^11.0 breeze-vue-blog.ENV 連接資料庫的設定檔
DB_CONNECTION=mysql
DB_HOST=127.0.0.1
DB_PORT=3306
DB_DATABASE=database_name
DB_USERNAME=database_user_name
DB_PASSWORD=database_password
若偵測不到 mysql,系統會很聰明的在 breeze-vue-blog\database 目錄下建立sqlite資料庫檔案: database.sqlite 並連到此 sqlite資料庫:database.sqlite
DB_CONNECTION=sqlite
# DB_HOST=127.0.0.1
# DB_PORT=3306
# DB_DATABASE=laravel
# DB_USERNAME=laravel
# DB_PASSWORD=laravel
Step 2: 安裝 Breeze、Inertia 與 Vue3 套件 (Install Breeze & Setup Inertia Js Vue 3)
先將 Breeze 加進專案
composer require laravel/breeze --dev安裝 Breeze ,則是要輸入 php artisan breeze:install 然後選擇 vue 。
PS W:\xampp\htdocs\breeze-vue-blog> php artisan breeze:install

  Which Breeze stack would you like to install?
  Blade with Alpine ................................... blade
  Livewire (Volt Class API) with Alpine ............... livewire
  Livewire (Volt Functional API) with Alpine .......... livewire-functional
  React with Inertia .................................. react
  Vue with Inertia ..................................... vue
  API only ............................................. api
❯ vue
選擇 Inertia SSR,利用 Inertia 渲染頁面成為 SSR 頁面
 Would you like any optional features? [None]
  None ..............................................
  Dark mode .................................... dark
  Inertia SSR ................................... ssr
  TypeScript (experimental) .............. typescript
❯ ssr
測試方式則選 PHPUnit
Which testing framework do you prefer? [PHPUnit]
  Pest ............................................ 0
  PHPUnit ......................................... 1
❯ 1
Step 3: Breeze 基本測試
// 執行 Laravel 服務
php artisan serve

// 安裝 NPM 套件及執行
npm install
npm run dev
Breeze 有簡單的基本帳號 CRUD 建立與登入認證
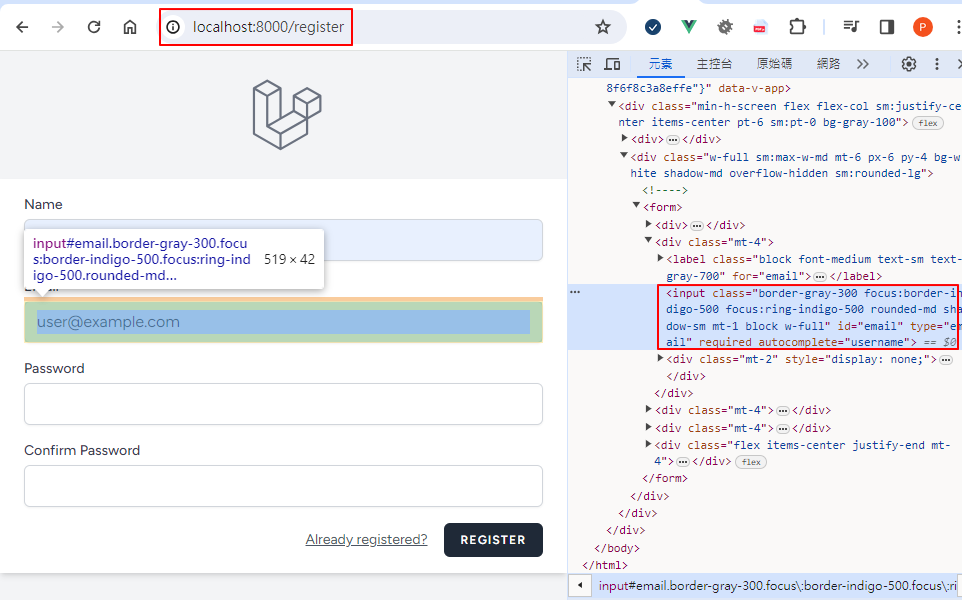
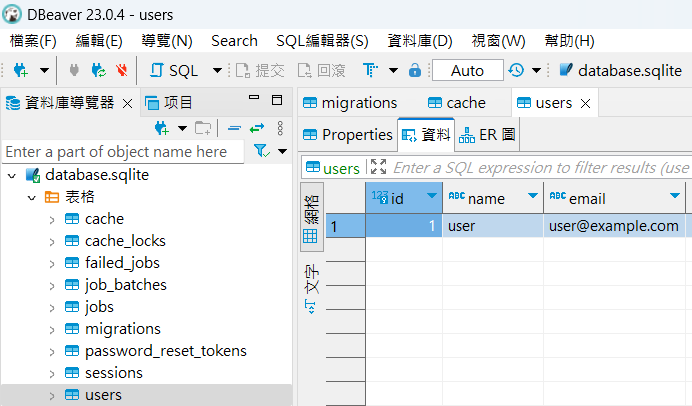
若偵測連不到 mysql,系統會自動建立 sqlite資料庫:database.sqlite,並將資料儲存於此。
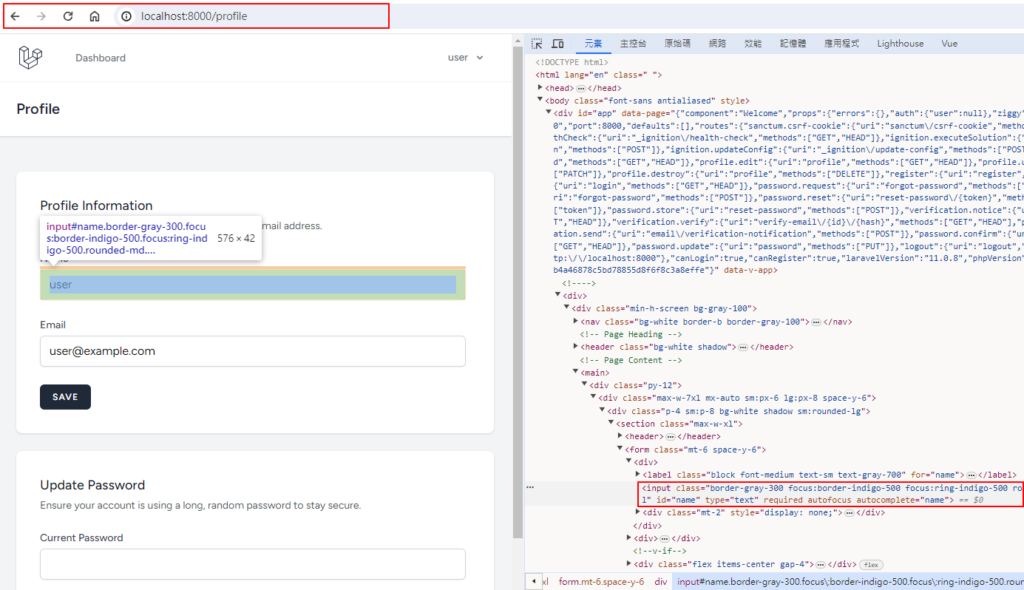
可以發現,Inertia 也將網頁轉成了 SSR 頁面可以供 SEO 作搜索。
Blog 維護範例 CRUD Operation Example
以下用一個 Blog 部落格的維護來作示範
Step 1: Create Blog Modal Migration and Controller Route
執行下列指令,產生 Modal、 Migration 及 Controller 檔
php artisan make:model Blog -mcr修改 database/migrations/create_blogs_table.php 內容:設計資料表 table:blogs 的欄位規格。
<?php

use Illuminate\Database\Migrations\Migration;
use Illuminate\Database\Schema\Blueprint;
use Illuminate\Support\Facades\Schema;

return new class extends Migration
{
    /**
     * Run the migrations.
     */
    public function up(): void
    {
        Schema::create('blogs', function (Blueprint $table) {
            $table->id();
            $table->string('title');
            $table->text('content');
            $table->timestamps();
        });
    }

    /**
     * Reverse the migrations.
     */
    public function down(): void
    {
        Schema::dropIfExists('blogs');
    }
};
修改 app/Models/Blog.php 檔:主要是設定那些欄位在 CRUD 維護時可以更新,以避免 SQL 注入的風險。
<?php

namespace App\Models;

use Illuminate\Database\Eloquent\Factories\HasFactory;
use Illuminate\Database\Eloquent\Model;

class Blog extends Model
{
    use HasFactory;

    protected $fillable = [
        'title',
        'content'
    ];

}
修改 routes/web.php:指定 blogs 在 VUE 維護的控制器: BlogController
<?php

use App\Http\Controllers\BlogController;
use App\Http\Controllers\ProfileController;
use App\Models\Blog;
use Illuminate\Foundation\Application;
use Illuminate\Support\Facades\Route;
use Inertia\Inertia;

Route::get('/', function () {
    return Inertia::render('Welcome', [
        'canLogin' => Route::has('login'),
        'canRegister' => Route::has('register'),
        'laravelVersion' => Application::VERSION,
        'phpVersion' => PHP_VERSION,
    ]);
});

Route::get('/dashboard', function () {
    return Inertia::render('Dashboard');
})->middleware(['auth', 'verified'])->name('dashboard');

Route::middleware('auth')->group(function () {
    Route::get('/profile', [ProfileController::class, 'edit'])->name('profile.edit');
    Route::patch('/profile', [ProfileController::class, 'update'])->name('profile.update');
    Route::delete('/profile', [ProfileController::class, 'destroy'])->name('profile.destroy');
});

Route::resource('blogs', BlogController::class);
require __DIR__.'/auth.php';
第29行程式,Laravel 自動產生下面7種不同的路由(Route),可以執行指令 php artisan route:list 查看目前所有的路由(Route)。
  GET|HEAD        blogs ......................... blogs.index › BlogController@index
  POST            blogs ......................... blogs.store › BlogController@store
  GET|HEAD        blogs/create .................. blogs.create › BlogController@create
  GET|HEAD        blogs/{blog} .................. blogs.show › BlogController@show
  PUT|PATCH       blogs/{blog} .................. blogs.update › BlogController@update
  DELETE          blogs/{blog} .................. blogs.destroy › BlogController@destroy
  GET|HEAD        blogs/{blog}/edit ............. blogs.edit › BlogController@edit
在前端的 template.vue 中可以使用下列指令來產生 Blog 首頁連結
<script setup>
import NavLink from '@/Components/NavLink.vue';
import { Link } from '@inertiajs/vue3';

const showingNavigationDropdown = ref(false);
</script>
<template>
	<NavLink :href="route('blogs.index')" :active="route().current('blogs.index')">
		Blog
	</NavLink>
	/** 或是下列程式產生 Blog 首頁連結 */
	<Link :href="route('blogs.index')"> Blog </Link>
</template>
維護 app/Http/Controllers/BlogController.php 控制器
Step 2: 建立前端Vue的頁面 Create Blog View File
接下來要建立 Blog 的首頁:Index.vue,新增頁面:Create.vue,與修改頁面:Edit.vue,與執行 CURD 功能的按鈕。
Blog 的首頁:resources\js\Pages\Blogs\Index.vue
<template>
    <Head title="Blogs" />

    <AuthenticatedLayout>
        <template #header>
            <h2 class="text-xl font-semibold leading-tight text-gray-800">
                Blogs Index
            </h2>
        </template>

        <div class="py-12">
            <div class="mx-auto max-w-7xl sm:px-6 lg:px-8">
                <div class="overflow-hidden bg-white shadow-sm sm:rounded-lg">
                    <div class="p-6 bg-white border-b border-gray-200">
                        <div class="mb-2">
                            <Link :href="route('blogs.create')">
                            <PrimaryButton>Add Blog</PrimaryButton>
                            </Link>
                        </div>
                        <div class="relative overflow-x-auto shadow-md sm:rounded-lg">
                            <table class="w-full text-sm text-left text-gray-500 dark:text-gray-400">
                                <thead
                                    class="text-xs text-gray-700 uppercase bg-gray-50 dark:bg-gray-700 dark:text-gray-400">
                                    <tr>
                                        <th scope="col" class="px-6 py-3">#</th>
                                        <th scope="col" class="px-6 py-3">
                                            Title
                                        </th>
                                        <th scope="col" class="px-6 py-3">
                                            Edit
                                        </th>
                                        <th scope="col" class="px-6 py-3">
                                            Delete
                                        </th>
                                    </tr>
                                </thead>
                                <tbody>
                                    <tr v-for="blog in blogs" :key="blog.id"
                                        class="bg-white border-b dark:bg-gray-800 dark:border-gray-700">
                                        <th scope="row"
                                            class="px-6 py-4 font-medium text-gray-900 dark:text-white whitespace-nowrap">
                                            {{ blog.id }}
                                        </th>
                                        <th scope="row"
                                            class="px-6 py-4 font-medium text-gray-900 dark:text-white whitespace-nowrap">
                                            {{ blog.title }}
                                        </th>

                                        <td class="px-6 py-4">
                                            <Link :href="route('blogs.edit', blog.id)
                                                " class="px-4 py-2 text-white bg-blue-600 rounded-lg">Edit</Link>
                                        </td>
                                        <td class="px-6 py-4">
                                            <PrimaryButton class="bg-red-700" @click="destroy(blog.id)">
                                                Delete
                                            </PrimaryButton>
                                        </td>
                                    </tr>
                                </tbody>
                            </table>
                        </div>
                    </div>
                </div>
            </div>
        </div>
    </AuthenticatedLayout>
</template>
<script setup>
import AuthenticatedLayout from "@/Layouts/AuthenticatedLayout.vue";
import PrimaryButton from "@/Components/PrimaryButton.vue";
import { Head, Link, useForm } from "@inertiajs/vue3";

const props = defineProps({
    blogs: {
        type: Object,
        default: () => ({}),
    },
});
const form = useForm({});

function destroy(id) {
    if (confirm("Are you sure you want to Delete")) {
        form.delete(route("blogs.destroy", id));
    }
}
</script>
Blog 的新增頁面:resources\js\Pages\Blogs\Create.vue
<script setup>
import AuthenticatedLayout from "@/Layouts/AuthenticatedLayout.vue";
import TextInput from "@/Components/TextInput.vue";
import PrimaryButton from "@/Components/PrimaryButton.vue";
import InputLabel from "@/Components/InputLabel.vue";
import InputError from "@/Components/InputError.vue";
import { Head, useForm } from "@inertiajs/vue3";

const props = defineProps({
    blogs: {
        type: Object,
        default: () => ({}),
    },
});

const form = useForm({
    title: "",
    content: "",
});

const submit = () => {
    form.post(route("blogs.store"));
};
</script>

<template>
    <Head title="Blog Create" />

    <AuthenticatedLayout>
        <template #header>
            <h2 class="text-xl font-semibold leading-tight text-gray-800">
                Blog Create
            </h2>
        </template>

        <div class="py-12">
            <div class="mx-auto max-w-7xl">
                <div class="overflow-hidden bg-white shadow-sm sm:rounded-lg">
                    <div class="p-6 bg-white border-b border-gray-200">
                        <form @submit.prevent="submit">
                            <div>
                                <InputLabel for="title" value="Title" />

                                <TextInput
                                    id="title"
                                    type="text"
                                    class="mt-1 block w-full"
                                    v-model="form.title"
                                    required
                                    autofocus
                                    autocomplete="username"
                                />

                                <InputError
                                    class="mt-2"
                                    :message="form.errors.title"
                                />
                            </div>

                            <div class="my-6">
                                <label
                                    for="content"
                                    class="block mb-2 text-sm font-medium text-gray-900"
                                    >Content</label
                                >
                                <textarea
                                    type="text"
                                    v-model="form.content"
                                    name="content"
                                    id=""
                                    class="bg-gray-50 border border-gray-300 text-gray-900 text-sm rounded-lg focus:ring-blue-500 focus:border-blue-500 block w-full p-2.5"
                                ></textarea>

                                <div
                                    v-if="form.errors.content"
                                    class="text-sm text-red-600"
                                >
                                    {{ form.errors.content }}
                                </div>
                            </div>
                            <PrimaryButton
                                type="submit"
                                :class="{ 'opacity-25': form.processing }"
                                :disabled="form.processing"
                            >
                                Submit
                            </PrimaryButton>
                        </form>
                    </div>
                </div>
            </div>
        </div>
    </AuthenticatedLayout>
</template>
Blog 的修改頁面:resources\js\Pages\Blogs\Edit.vue
<script setup>
import AuthenticatedLayout from "@/Layouts/AuthenticatedLayout.vue";
import TextInput from '@/Components/TextInput.vue';
import InputLabel from '@/Components/InputLabel.vue';
import InputError from '@/Components/InputError.vue';
import PrimaryButton from "@/Components/PrimaryButton.vue";
import { Head, useForm } from "@inertiajs/vue3";

const props = defineProps({
    blog: {
        type: Object,
        default: () => ({}),
    },
});

const form = useForm({
    id: props.blog.id,
    title: props.blog.title,
    content: props.blog.content,
});


const submit = () => {
    form.put(route("blogs.update", props.blog.id));
};
</script>

<template>
    <Head title="Blog Edit" />

    <AuthenticatedLayout>
        <template #header>
            <h2 class="text-xl font-semibold leading-tight text-gray-800">
                Blog Edit
            </h2>
        </template>

        <div class="py-12">
            <div class="mx-auto max-w-7xl sm:px-6 lg:px-8">
                <div class="overflow-hidden bg-white shadow-sm sm:rounded-lg">
                    <div class="p-6 bg-white border-b border-gray-200">
                        <form @submit.prevent="submit">
                            <div>
                                <InputLabel for="title" value="Title" />

                                <TextInput id="title" type="text" class="mt-1 block w-full" v-model="form.title" required
                                    autofocus autocomplete="username" />

                                <InputError class="mt-2" :message="form.errors.title" />
                            </div>
                            <div class="my-6">
                                <label for="slug"
                                    class="block mb-2 text-sm font-medium text-gray-900 dark:text-gray-300">Content</label>
                                <textarea type="text" v-model="form.content" name="content" id=""
                                    class="bg-gray-50 border border-gray-300 text-gray-900 text-sm rounded-lg focus:ring-blue-500 focus:border-blue-500 block w-full p-2.5"></textarea>

                                <div v-if="form.errors.content" class="text-sm text-red-600">
                                    {{ form.errors.content }}
                                </div>
                            </div>
                            <PrimaryButton type="submit" :class="{ 'opacity-25': form.processing }"
                                :disabled="form.processing">
                                Submit
                            </PrimaryButton>
                        </form>
                    </div>
                </div>
            </div>
        </div>
    </AuthenticatedLayout>
</template>
Step 3: 執行測試 Run Application Server
// 執行 Laravel 服務
php artisan serve

// 安裝 NPM 套件
npm install

// 執行
npm run dev
// or
npm run build
Tags
Video

發佈留言